All guides
- Install on macOS
- Install on Windows
- Install on Linux
- Getting started
- Your first scene
- Chat, overlays and alerts
- Going live
- Streaming to Velora with VELoQ
- Recording and the replay buffer
- Transitions and studio mode
- Screenshots
- Automations and hotkeys
- Themes and Theme Studio
- Stream Deck, Touch Portal and Companion
- Face tracking with Velum Avatars
- Updates
- Velum Gauges
- Games and what you need
- Forza Horizon 4, 5 and 6
- Forza Motorsport
- F1 23, F1 24 and F1 25
- American Truck Simulator and Euro Truck Simulator 2
- X-Plane 11 and 12
- Microsoft Flight Simulator 2020 and 2024
- Two PCs: gaming and streaming
- When Velum Gauges hears nothing
Guides › Get started
Your first scene
Add a scene, add layers, and make them look the way you want.
A scene is one look for your stream: Starting Soon, your main view, Be Right Back. Each scene is a stack of layers: a camera, a game, a picture, some text, your chat. Here's how to build one.
Add a scene
- In Scenes, click + and choose New Scene.
- Double-click it to give it a name.
New Divider adds a heading that groups scenes, like Brand in the pictures here. Right-click a scene for Rename, Add to current scene (to use one scene inside another), Transition into this scene and Delete. Deleting a scene asks first, and can be undone.
Add layers
In Layers, click + (Add layer). Everything you can add is in this one menu:
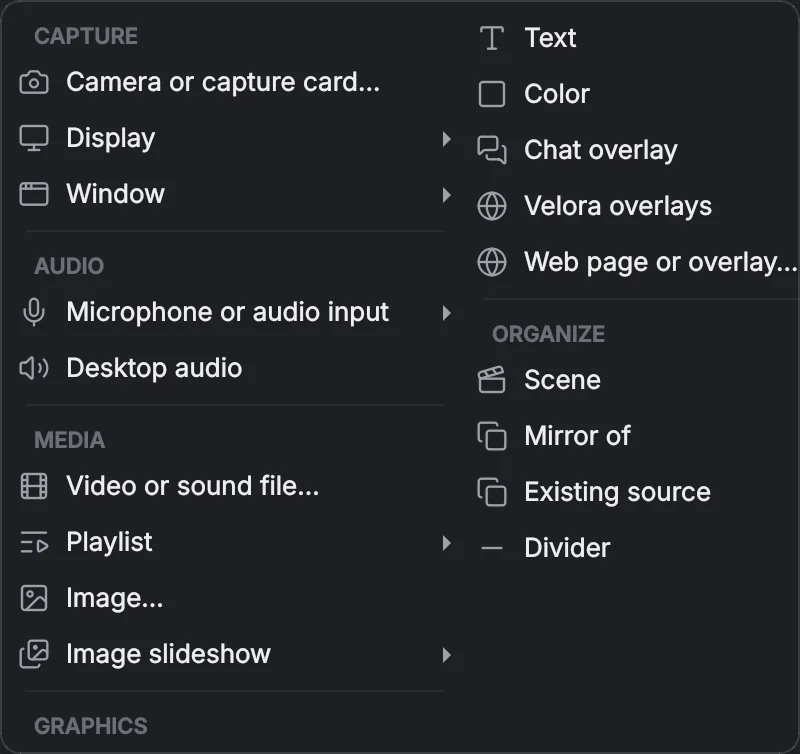
| Capture | Camera or capture card…, Display, Window, and on Windows and Mac Spout or Syphon for avatar and visual apps. |
|---|---|
| Audio | Microphone or audio input and Desktop audio. |
| Media | Video or sound file… (it loops), Playlist, Image… and Image slideshow. |
| Graphics | Text, Color, Chat overlay, Velora overlays and Web page or overlay… (a web address or a local HTML file). |
| Organize | Scene (another scene inside this one), Mirror of (the same picture again, edited on its own), Existing source and Divider. |
Layers higher in the list are drawn on top. Drag them to reorder. Each row has an eye to show or hide it, and a lock that appears when you point at it.
Move, resize and crop
- Move: drag a layer in the Program. It snaps to the canvas edges and middle and to other layers; hold Ctrl (⌘ on a Mac) while dragging to place it freely.
- Resize: drag a corner. It keeps its shape; hold Shift to stretch it.
- Nudge: arrow keys move it 1 px, with Shift 10 px.
- Crop and shape: a small toolbar floats over the selected layer. It has Crop (drag the edges in; Esc or Enter when you're done), Square corners, Rounded corners, Circle, Pill and Rotate 90°. Drag a corner's dot to round the corners by eye.
Make it look right: the Inspector
Select a layer and the Inspector shows everything about it:
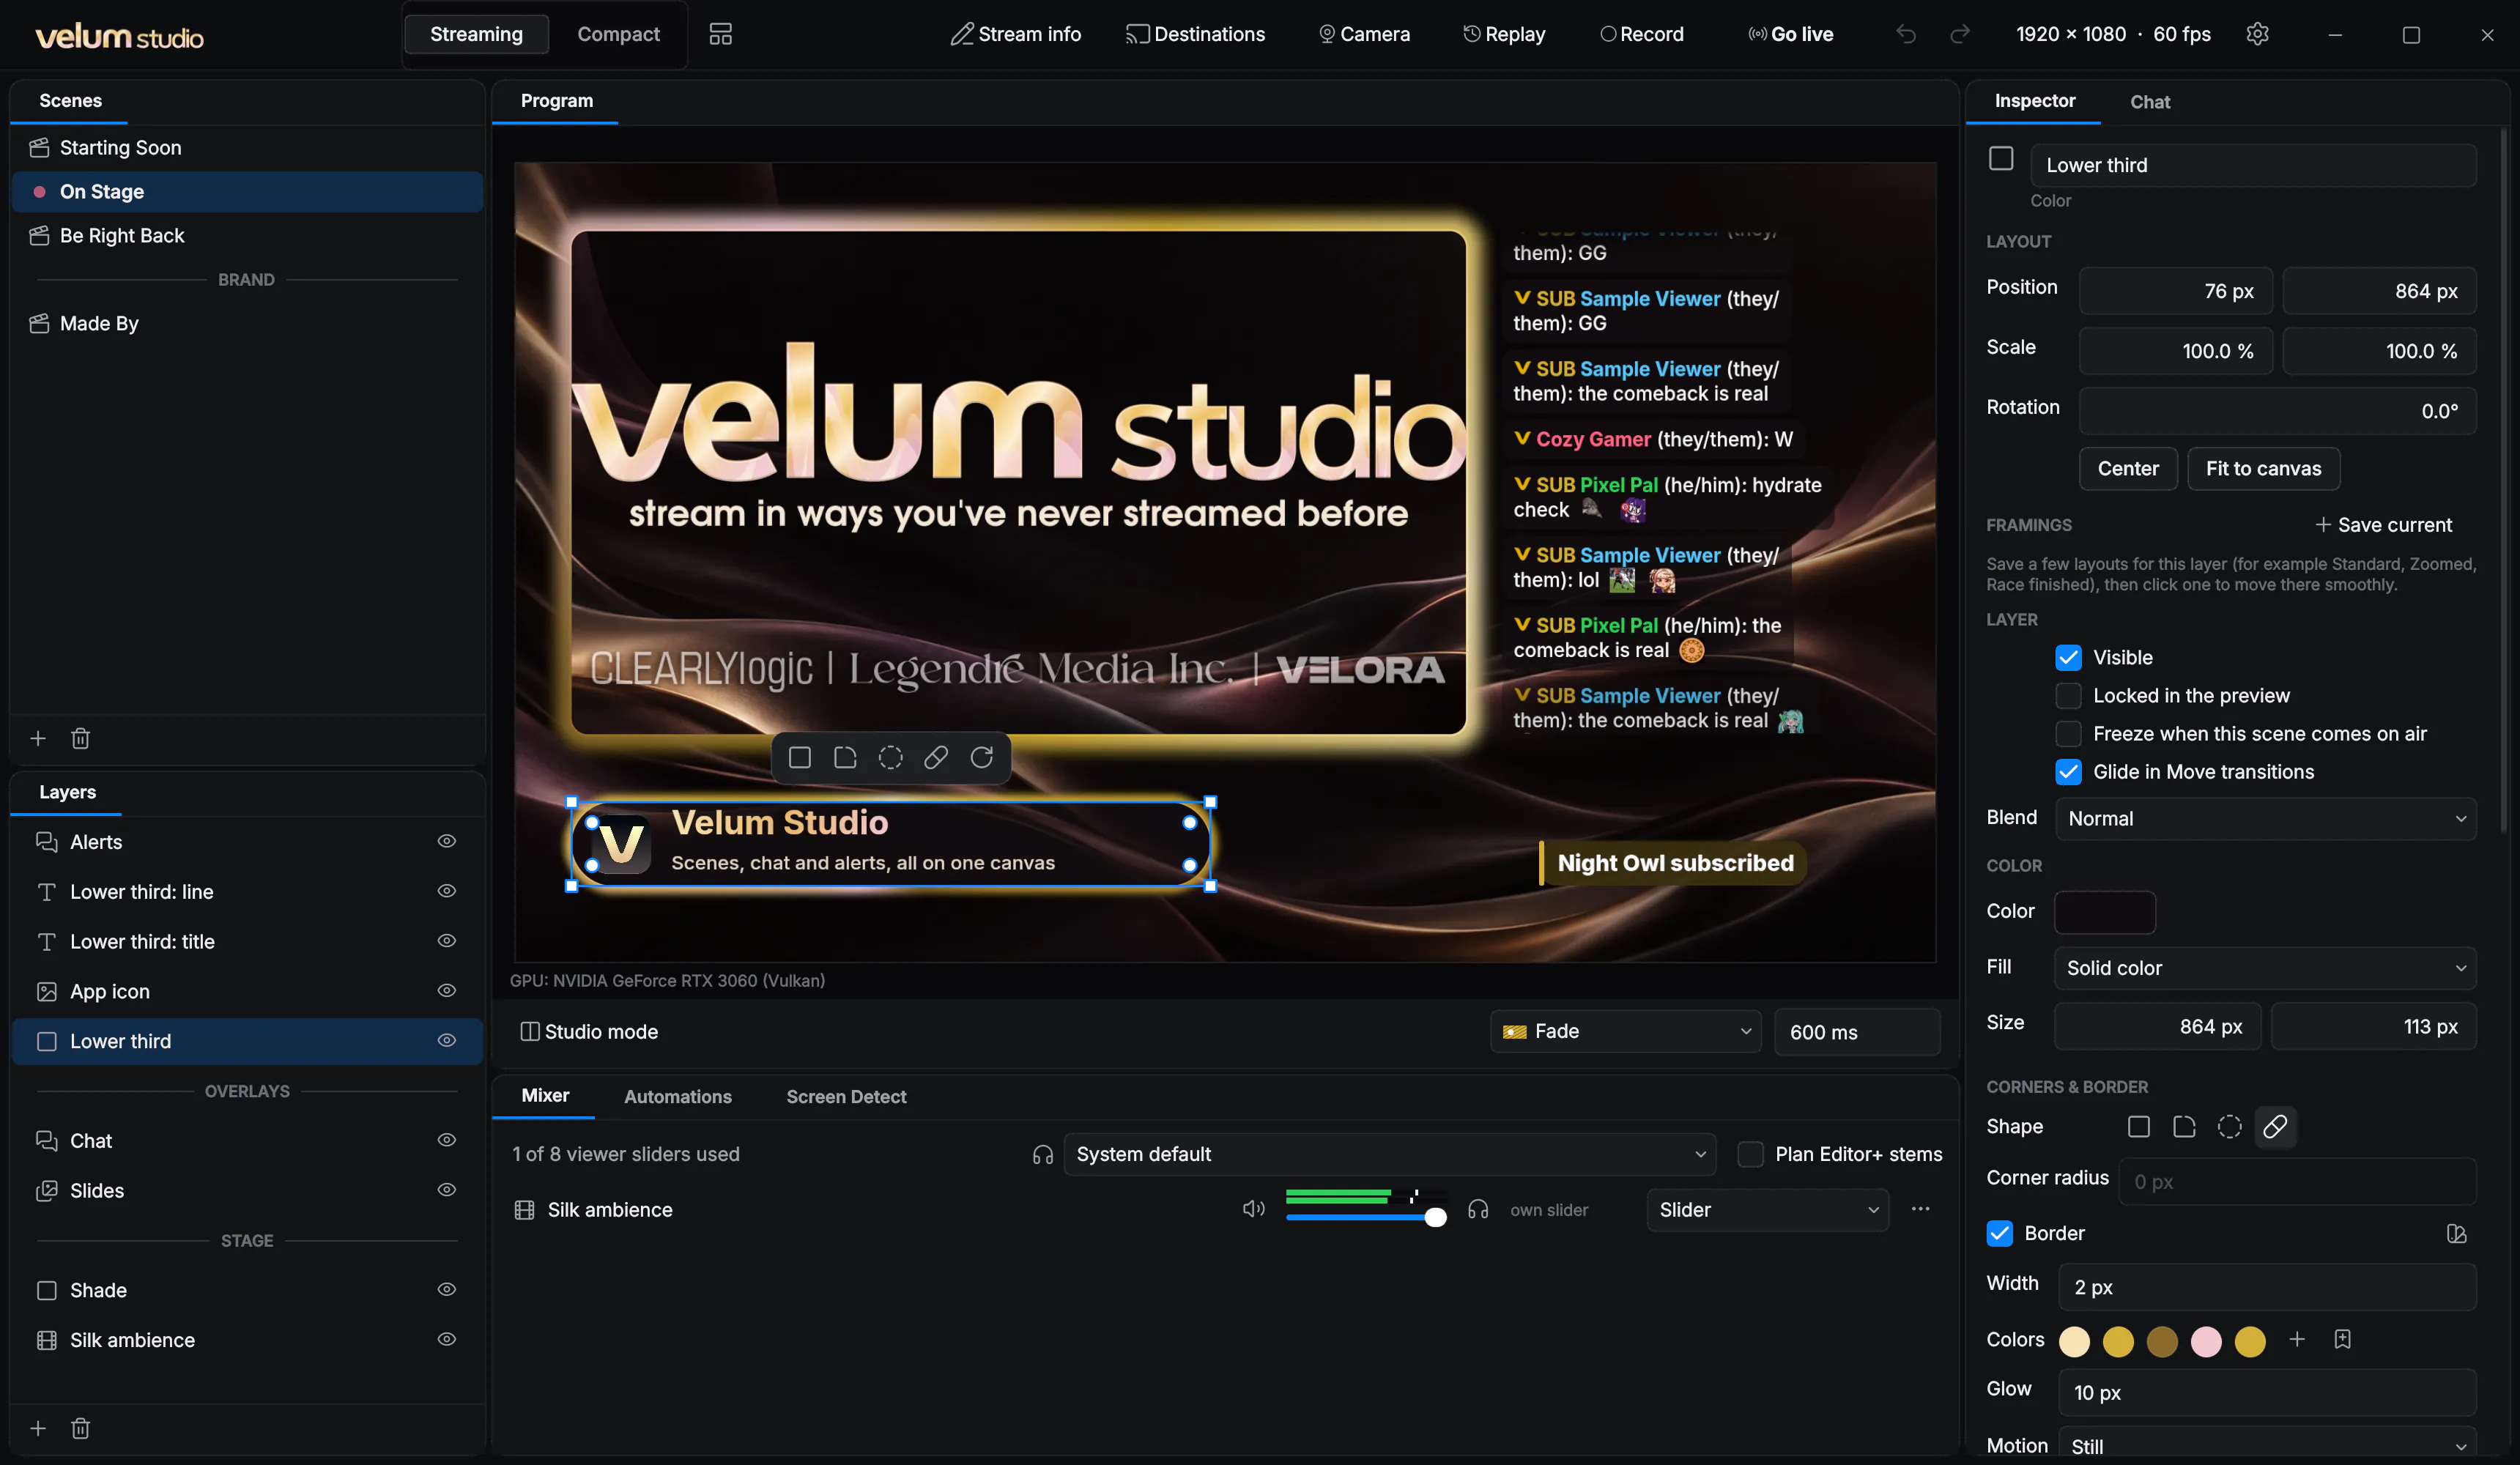
- Layout: position, scale and rotation, with Center and Fit to canvas.
- Framings: Save current keeps where the layer is as a named framing. Click a framing and the layer glides there. Each framing has its own timing and feel, from Smooth to Bounce.
- Layer: Visible, Locked in the preview, Freeze when this scene comes on air (hold the picture it had when the scene went on air), Glide in Move transitions, and the blend mode.
- The layer's own settings: words, font and size for text; color or a gradient fill (linear, radial or conic) for text and color layers; the file and looping for media; and so on.
- Corners & border: shape and corner radius, and a border of one color or a gradient. Give it a glow, make it pulse, or let the gradient travel around the edge.
- Effects: one click for B&W, Sepia, Duotone, Tint, Invert, Thermal, Poster, Pixelate, Fisheye, VHS, Hologram, Ghost, Glitch, Vignette, 3D, Sketch, Shine, Wave, Shake, Flicker, Pulse, Rainbow or Reveal.
- Filters: Add chroma key or background removal, color correction and grading, blur, drop shadow, glow, an image mask, a freeze frame or your own shader. For sound: noise suppression, a noise gate and gain.
The canvas
Click the canvas size at the top (for example 1920 × 1080 · 60 fps) to choose 1280 × 720, 1920 × 1080, 2560 × 1440, 3840 × 2160, 1080 × 1080 or 2560 × 1080. When the shape changes, Studio asks whether to keep your layers at the edges, keep them centred, or stretch them. The same menu turns on Snap to grid.
A vertical canvas, too
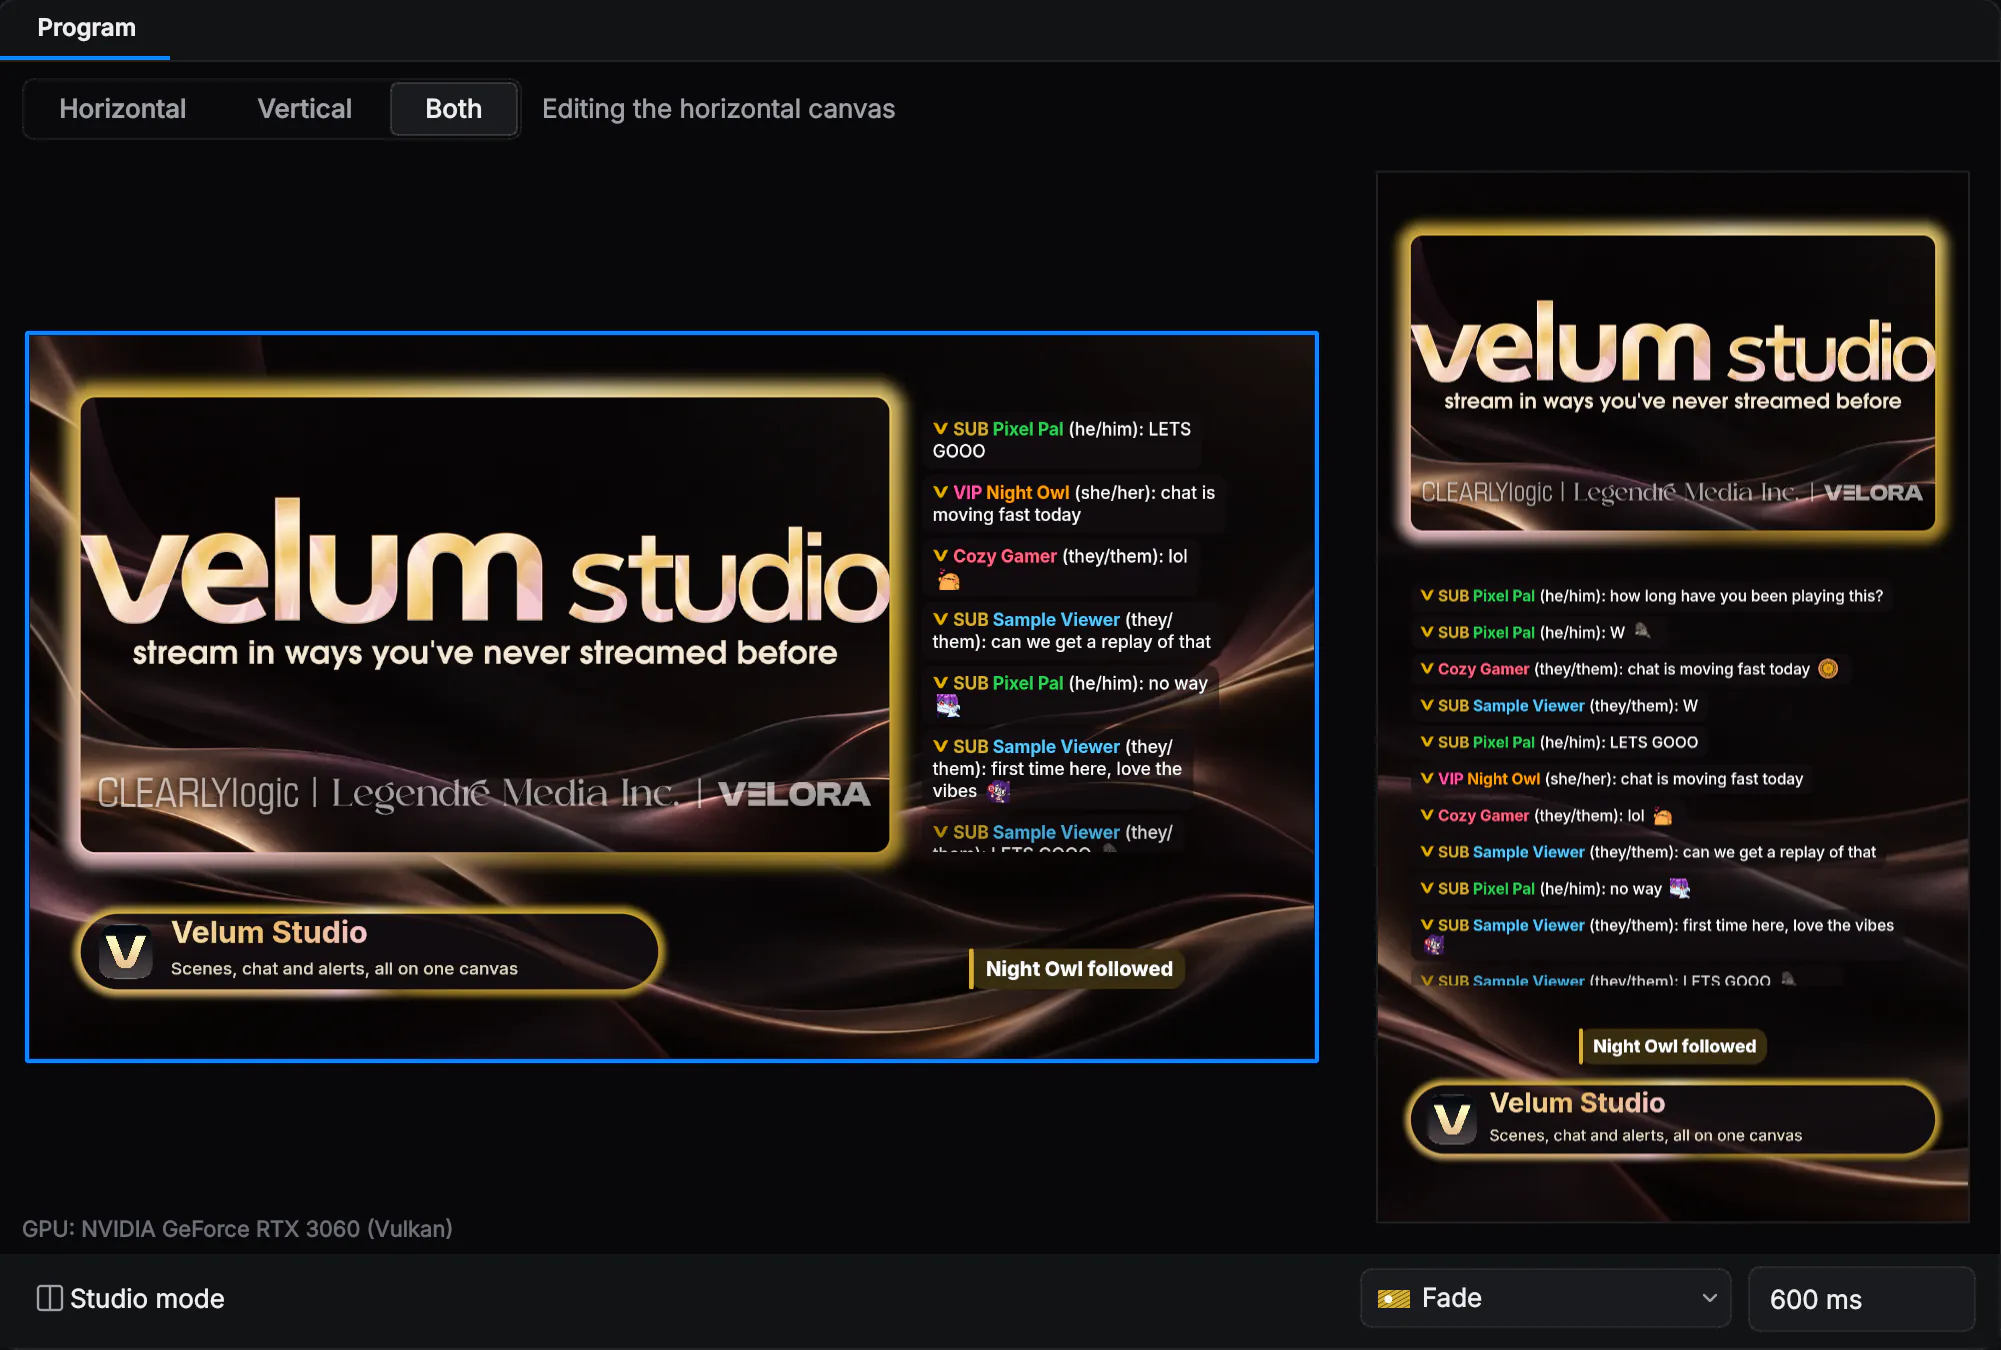
For TikTok, Instagram and other vertical platforms, choose the gear › Video › Vertical canvas (1080 × 1920, 720 × 1280 or 1440 × 2560). The Program gets Horizontal, Vertical and Both tabs.
A scene with no vertical layout yet shows its horizontal one, fitted. Choose Make vertical layout to start from the horizontal one, or Start empty. Made from the horizontal one, the layers are linked: they show and hide together, while you arrange each canvas for its own shape.