
All guides
- Install on macOS
- Install on Windows
- Install on Linux
- Getting started
- Your first scene
- Chat, overlays and alerts
- Going live
- Streaming to Velora with VELoQ
- Recording and the replay buffer
- Transitions and studio mode
- Screenshots
- Automations and hotkeys
- Themes and Theme Studio
- Stream Deck, Touch Portal and Companion
- Face tracking with Velum Avatars
- Updates
- Velum Gauges
- Games and what you need
- Forza Horizon 4, 5 and 6
- Forza Motorsport
- F1 23, F1 24 and F1 25
- American Truck Simulator and Euro Truck Simulator 2
- X-Plane 11 and 12
- Microsoft Flight Simulator 2020 and 2024
- Two PCs: gaming and streaming
- When Velum Gauges hears nothing
Guides › Get started
Getting started
A tour of the window, the panels, the settings menu, and bringing your scenes over from OBS.
Velum Studio opens with a scene collection called Default collection: one scene named Scene, on a 1920 × 1080 canvas at 60 frames a second, with a 300 ms fade between scenes. Here's the window you'll work in.
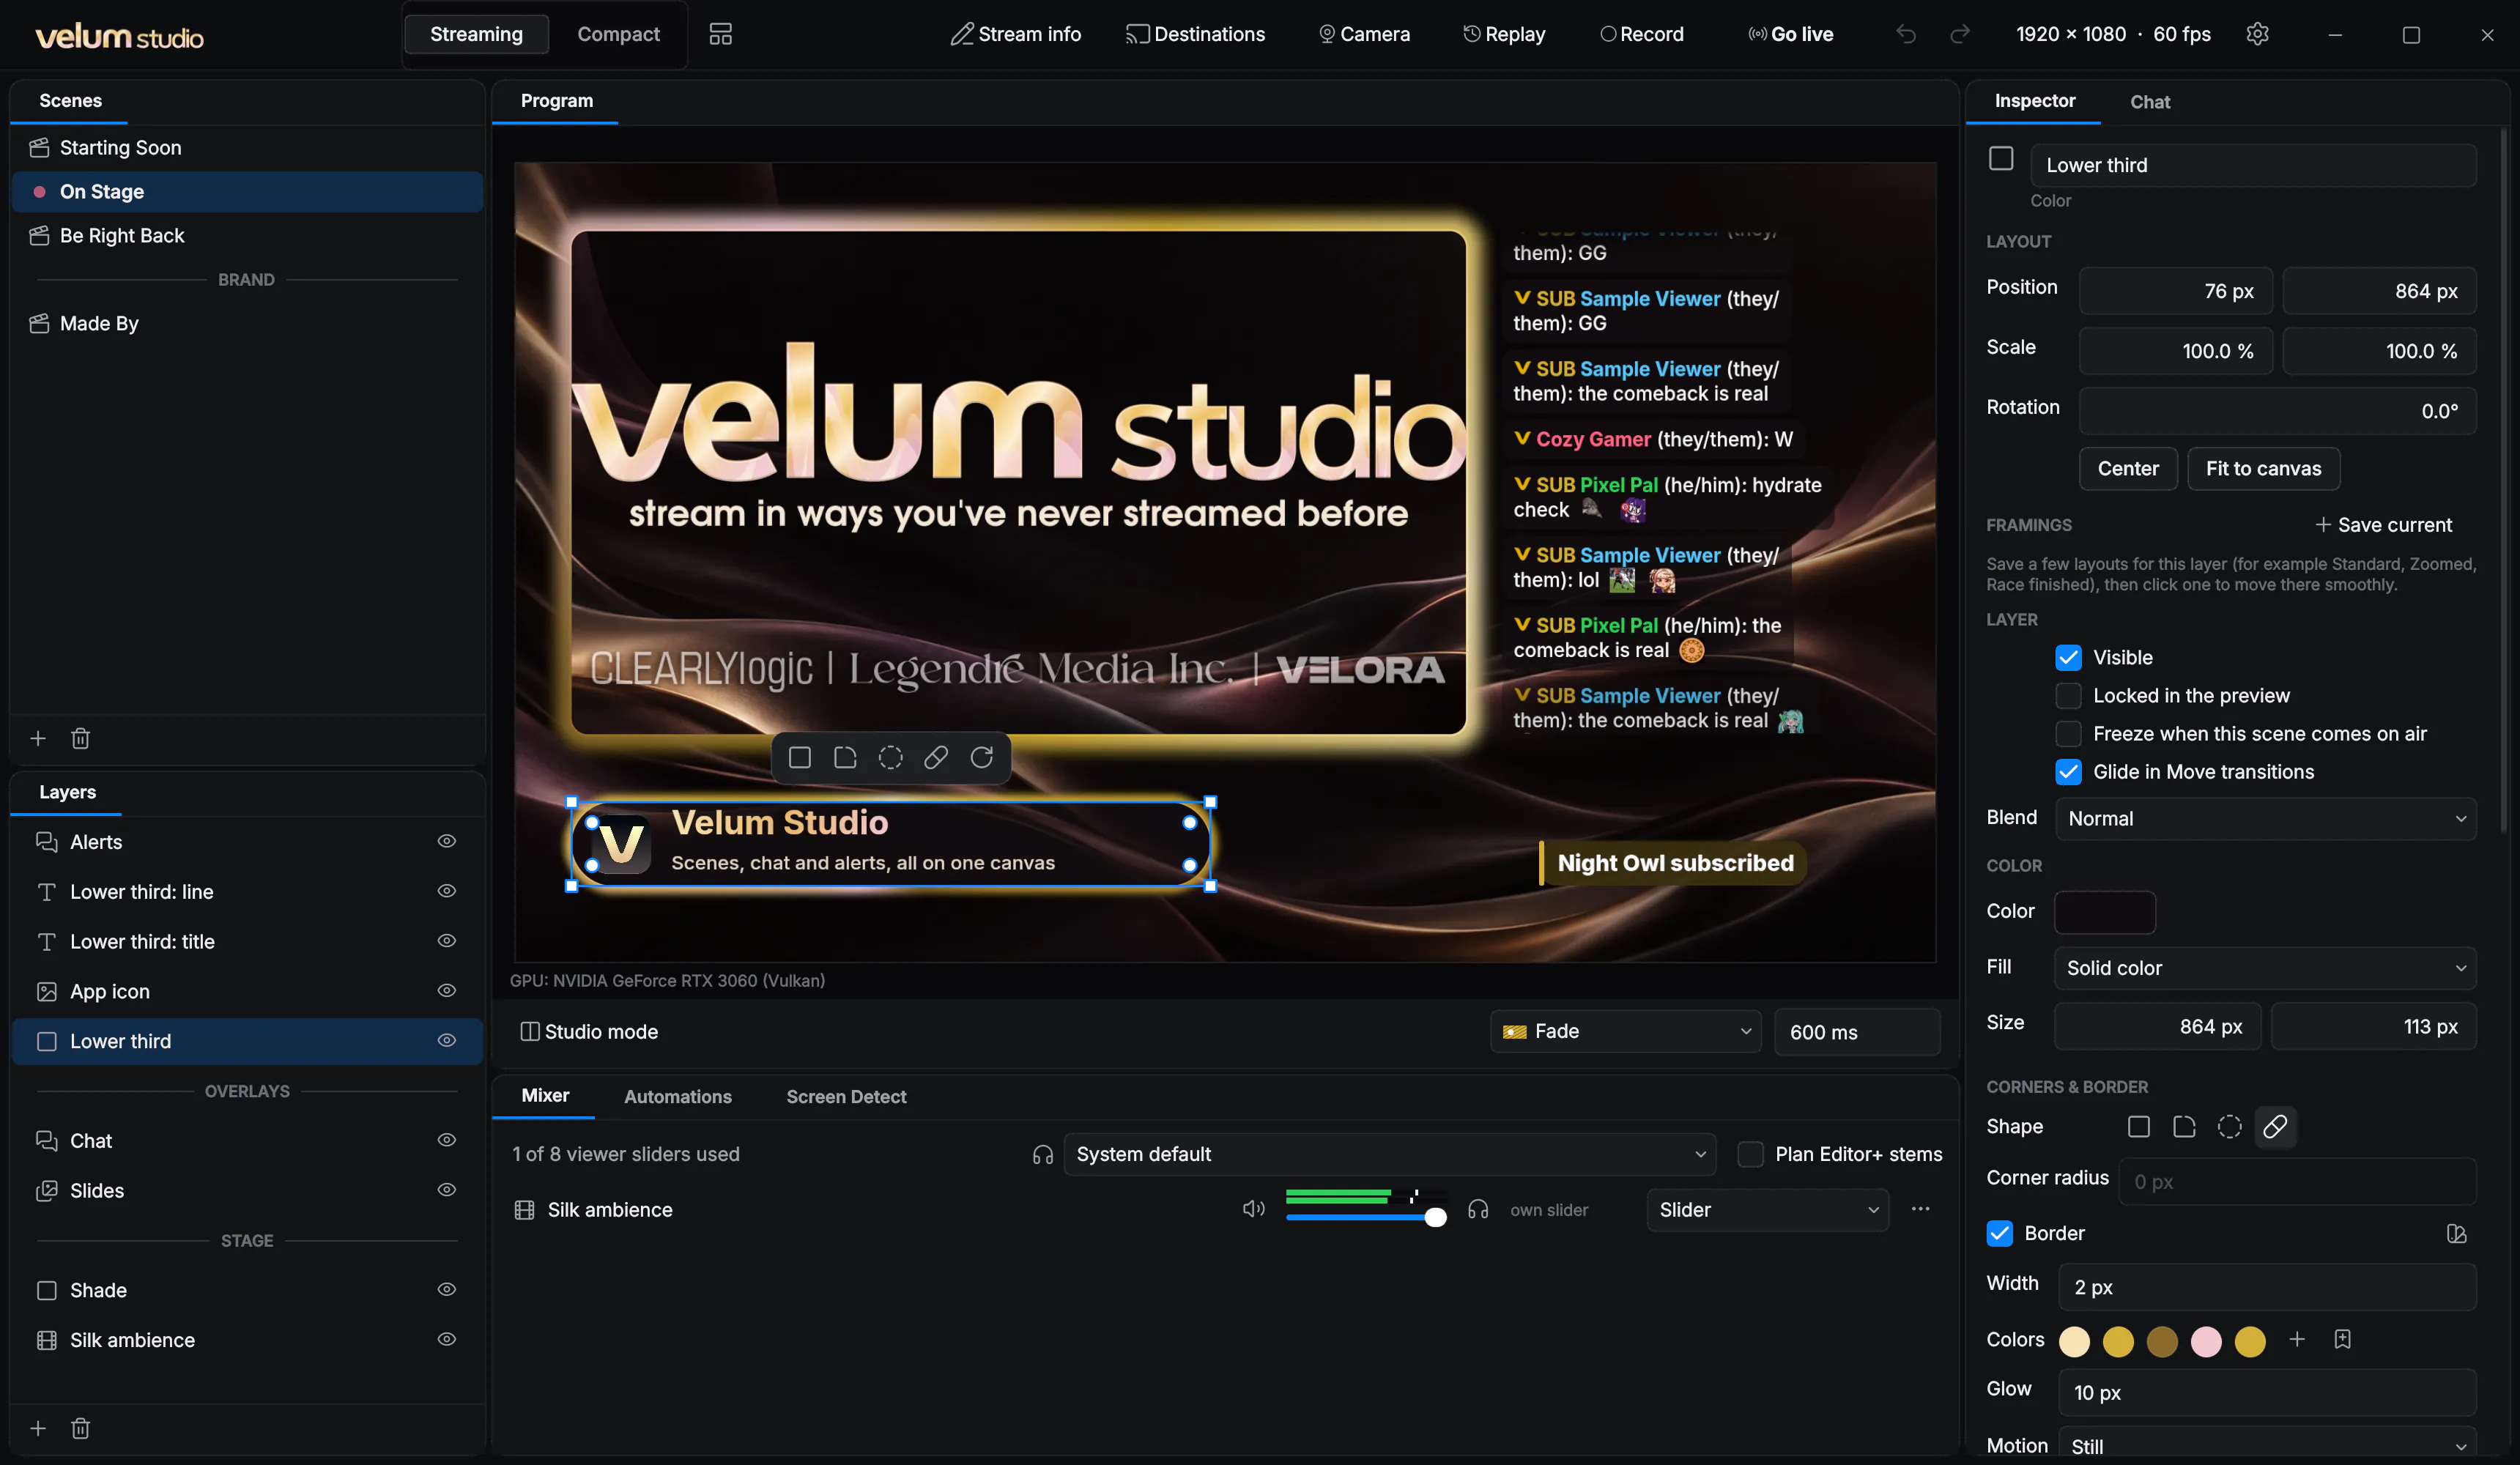
Across the top
| Streaming, Compact | Window layouts. Your own saved layouts appear here too. |
| Stream info | Your title, category and tags, on every platform at once. See Going live. |
| Destinations | Where Go live sends your stream. |
| Camera | Turns the Velum Studio Camera on and off. |
| Replay | The replay buffer. While it's on, Save replay appears next to it. |
| Record | Starts and stops recording, with a pause button while you record. |
| Go live | Starts and ends your stream. |
| Undo, Redo | Every change you make can be undone. |
| Canvas size | For example 1920 × 1080 · 60 fps. Click it to change the canvas size or turn on snapping to a grid. |
| The gear | Settings and more (below). |
The panels
- Scenes: your scenes. Click one to put it on air.
- Layers: what's in the selected scene, top to bottom.
- Program: what's on air, where you arrange layers. The transition bar sits underneath.
- Inspector: the settings of the layer you've selected.
- Chat: chat from every platform you've connected.
- Mixer: the volume of everything with sound.
- Automations and Screen Detect: things Studio does by itself. See Automations and hotkeys.
Streaming puts Scenes above Layers on the left. Compact puts them in one column with tabs, which leaves more room for the Program. Drag a panel's tab to move it anywhere. The layouts button beside them has Save current layout as…, Manage layouts…, Reset to default and Lock layout.
The gear menu
- File: Import… and Export for Velum files (scene collections, settings, themes, presets and full backups).
- Appearance…: themes, plus Files and folders…, Remote control… and Updates…. The shortcut is Ctrl + , (⌘ + , on a Mac).
- Permissions…: what Studio may use on this computer.
- Replay buffer…: how much the replay buffer keeps.
- Updates…
- Video › Vertical canvas: a second, tall canvas. See Your first scene.
- Collection: switch, create or import scene collections.
- Help › Check for updates…
Bring your scenes from OBS
Choose the gear › Collection › Import from OBS… and pick a scene collection. The picker opens in OBS's scenes folder. Studio makes a new collection from it with your scenes, groups, layers in their exact positions, sources and audio settings, and shows a report of what came across. It also brings your replay buffer length and file naming. Your OBS files aren't changed. Stream keys and passwords aren't imported; you add your platforms in Studio.
Handy keys
| Undo | Ctrl + Z (⌘ + Z) |
| Redo | Ctrl + Shift + Z or Ctrl + Y (⌘ + Shift + Z) |
| Appearance | Ctrl + , (⌘ + ,) |
| Nudge a layer | Arrow keys (1 px), with Shift (10 px) |
| Remove a layer | Delete or Backspace |
Next: Your first scene.